Monday, June 9, 2014

The Importance of Family Dinners

When was the last time you gathered with your family for a meal that wasn't related to a special occasion like Thanksgiving?  Several months ago, my family started gathering at my house for Saturday Evening Suppers--I'm always the cook--still trying to figure out how THAT happened.

We enjoy this time together and have grown much closer during the process.  It is a couple hours of laughter, groaning about eating too much and sharing stories from our week.

I think the best part is how happy it has made my Mama.  As the middle girl, my sisters and I grew up fighting like cats and dogs.  And no, I don't mean arguing, I mean hair pulling, biting, scratching and trying our darnedest to hurt each other--my mother used to say we were going to give her a nervous breakdown!  As I kid, I had no idea what that meant--just assumed it meant going cuckoo for cocoa puffs.  Anyway, move forward 30 years and we've become much closer.

When my husband passed, my sisters gathered around me and without their support, I don't know if I could have made it through it--for the first time in years, we felt like sisters and not enemies.  I love them dearly, and we would do anything for each other.

Okay, now for the good stuff!!  Everything in the salad came from my garden (well, except for the cheese and croutons) and it was wonderful!  This was the first time I have planted lettuce, but you can bet I will plant double next year.

Last but not least--the Strawberry Trifle--very easy and perfect dessert for a hot summer day.

Ingredients
Strawberries - 1 qt sliced
1 box instant vanilla pudding
1 cup of sour cream
2 cups heavy cream, whipped
1 tsp orange zest
Angel Food Cake

Slice the strawberries.  Prepare the pudding according to package directions.  Mix in sour cream, whipped cream and orange zest.

Cut cake into bite size pieces.  Place one layer in the bottom of a trifle dish or large bowl and top with pudding mixture and strawberries.  Repeat, topping off with pudding mixture.  I reserved some whipped cream and a few whole strawberries for garnish.  Refrigerate at least an hour before serving.


Cucumber Explosion!

We've been blessed this summer in the amount of rainfall received.  I have more cucumbers than know what to do with!  Even though I still have about 20 quarts of pickles I put up a couple years ago, I spent this weekend making more.  Cannot imagine letting them go to waste. 

I planted an heirloom variety of pickle, Parisian Pickling cucumber, and their flavor is more intense and delicious than any cucumber that comes from a grocery store.

But even I know there is only so many pickles one person can eat, so if any of you guys out there have any cucumber ideas, let me know!

Wednesday, June 4, 2014

Bounty from the Garden

The garden is starting to produce in waves.  In addition to the onions, garden peas, broccoli and cucumbers below, I have squash coming out of my ears!  I'm breaking out the canning jars this weekend and will can plenty for stewed squash and onions.  I think I could eat that every day with loads of black pepper and hot cornbread.  Nothing like food from the south :-)

Mama's Birthday

This weekend we celebrated my Mama's 79th birthday.  The whole family was there and she was truly surprised.  The birthday cake I chose to make was a classic white cake with raspberry filling and buttercream frosting.  Happy times and Happy Birthday Mama--we love you much
!

Tuesday, May 27, 2014

Wild Plum Jelly

Spent a perfect Saturday afternoon with my sister and niece foraging for wild plums.  Luck was on our side and we discovered a treasure trove.  My niece ate more than she contributed to the pan, but within 30 minutes, we came away with a small dish pan full.

I only wanted a few jars but thanks to my magical steamer I ended up with FIFTEEN pints!  I now have jelly coming out of my ears.  So far, I've put up 12 pints of blackberry, 6 of huckleberry and now 15 plum.  As we say here in the south, "make hay while the sun is shining" because next year, the bounty may not be as plentiful.

Take advantage of what nature puts in front of you.  The blackberries were so abundant this year and bigger than I've seen in a long time.  My huckleberry bushes were loaded, but they are so small, it takes a lot of them to do one cooking.  I may go back for some more plums and try canning them whole in syrup (never done this before).  There are just so many of them, I hate to let them go to waste.


Monday, May 19, 2014

Heavenly Coconut Cream Pie

This is one of my families favorite desserts.  I made it for my best friend and she went nuts over it and has herself used it for special occasions. 

Disregard the overly brown crust :-).  My Bigmama's maiden name was Dawson and whenever she overcooked (or burnt something) my Bigdaddy would always says "she put the Dawson brand on it".   Maybe I should title this one Dawson Brand Coconut Cream Pie.


Pie Crust

12 tablespoons (1 1/2 sticks) very cold unsalted butter
3 cups all purpose flour
1 teaspoon kosher salt
1 tablespoon sugar
1/3 cup very cold vegetable shortening (Crisco is my choice)
6 to 8 tablespoons (about 1/2 cup) ice water

Dice the butter and shortening and refrigerate for at least 30 minutes.  I place mind in the freezer for 15 minutes.  Pour flour, salt and sugar into a food processor
and pulse a couple times to mix.  Add the butter and shortening and pulse until it is incorporated and about the size of peas.  With the food processor running, slowly add the water until the dough begins to form a ball.  Remove and roll into a ball and refrigerate at least 30 minutes before use.  This makes enough for two pies.

Roll out the crust and transfer to your pie plate.  Line with parchment paper and add pie weights (you can use dried beans but you won't be able to use them afterwards).  Blind bake the crust in a 425 degree oven for 12 to 15 minutes.  Make sure you set the timer or it make end up branded like mine. 

Coconut Cream Pie

1 cup granulated sugar
1/2 cup all purpose flour
1/4 tsp salt
3 cups of whole milk
4 eggs, separated
3 tablespoons of butter
1 1/2 tsp vanilla extract
1 cup plus 1/3 cup flaked coconut

Topping
3 cups heavy whipping cream
3 tablespoons of sugar

In a medium saucepan on medium-high heat combine the sugar, flour and salt.  Gradually stir in the milk.  Cook, stirring constantly until it is thickened and bubbly.  Reduce heat and cook for 2 minutes.  Remove from heat.  In a small bowl slightly beat the egg yolks.  Very slowly stir in 1 cup of the hot milk mixture into the egg yolks.  Make sure you beat well and fast while adding the hot mixture or you will scramble the eggs.  Pour the egg yolks into the saucepan with the remaining milk mixture.  Return to the heat on medium-high and bring to a slow boil.  Cook 2 minutes stirring constantly.  Remove from the heat and stir in the butter, vanilla and 1 cup of coconut.  Stir well until butter is melted and vanilla is well Incorporated.  Pour into baked pie crust and refrigerate until cool. 

Once pie is thoroughly cooled, whip the cream and sugar together until stiff peaks form.  Spread over pie.  Toast the remaining 1/3 cup of coconut either in a skillet on top of the stove or on a cookie sheet in a 400 degree over (burns easily so watch carefully).  Sprinkle across the whipped cream and refrigerate pie until serving.

Tuesday, May 13, 2014

Being Prepared

We all know the importance of being prepared spiritually--Matthew 24:42 Therefore keep watch, because you do not know on what day your Lord will come.  But how many of us realize the importance of being ready physically?

We all know we should have money tucked away in a savings account for a "rainy day" but what other preparations are just as important?  Do you know that the average household has less than one-weeks food?  What if something catastrophic were to occur that impacted you and your family.  It could be something as predictable as a hurricane or something as unpredictable as a work stoppage or strike.

Think about preparing your family for the unknown, the what if and the someday because someday could be tomorrow.

It is my intent to store at least 18 months were of food.  If something happened and I lost my job or had unexpected medical expenses, at least I know I would be able to feed myself and my family.

Take small steps and you will be surprised at how quickly it adds up.  Going to the store?  Buy a couple of extra cans of tuna or an extra jar of peanut butter.  Place this away from your regular pantry items and consider it just like your rainy day fund. 

I've attached a couple of photos of my pantry--these are items I have left over from last years canning, but it is no where near what I should have. 


Old Fashioned Blackberry Jelly


There is nothing that personifies the south like blackberry jelly.  I remember as a child walking the fence rows and ditches with my Bigmama, a dishpan in hand gathering wild blackberries.  Of course, we ate as many as we picked, and she was constantly on the lookout for "rattlers".  My husband used to say there were 3 types of snakes in the world and all three would hurt you or make your hurt yourself:  1) poisonous 2) non-poisonous and 3) stick that looks like a snake.  That 3rd one got me more than once this weekend.

I happened across a vintage steamer in a flea market a couple of years back and this was the first time I've used it.  This thing is AWESOME!!  I was able to get almost 3/4 gallon of juice from the berries and it is all straight juice, no water added.  Simple too.  Just put it on the stove, adjust the temp (make sure you don't have any leaks--as you can see from my photos, that was a lesson learned mid-way through the process).  About 75 minutes later, I was in blackberry juice heaven!  I cannot wait to try it with plums and grapes.

As with any canning, ensure your jars are free of cracks and chips and well sanitized.  I know some people use a dishwasher, but I boil mine for about 10 minutes in my water bath canner then leave them sitting until the jelly is ready for jars. 

This type of jelly is beyond simple to make, and the great part, you know everything that's in it.  No artificial flavoring or colors.

3 3/4 cups blackberry juice
4 1/2 cups sugar
1 box of pectin (I always use Sure-Jell)

Add the pectin to the juice and bring to a roiling boil (stirring constantly) that cannot be stirred down.  Immediately add all the sugar and continue stirring constantly.  Once it comes to a full roiling boil, cook for 1 minute exactly and remove from heat.  You can add 1/2 tbsp of butter if you'd like to cut down on the foam.

Skim the foam from the top and ladle into hot jars leaving 1/2" head space.  Wipe rims well with a clean cloth and place lids and rings.  Finger tighten and then water bath for 5 minutes.  This recipe should produce six (6) 1/2 pints or three (3) pints of beautiful delicious jelly.  Enjoy!


Square Foot Garden Update


My garden looks wonderful!  Thank you Lord for the blessed rainfall.  I am hoping to have a bounty of fresh vegetables.  Time to start checking all the canning jars!!  This is my first year using the SF method and I have to admit, I was skeptical trying to grow so many items in such a small space, but the plants appear to be thriving.  I already have baby squash and tiny tomatoes and all the peppers are loaded with blooms.  Next year, I believe I will add more boxes.  I planted the following items and I will post updates on how they produce in case anyone else is thinking about experimenting with this concept:
Carrots (red, purple and white)
Lettuce (bib, red ruffle, romaine)
Scarlett Runner Beans (notice the pretty red flowers in the photos)
Purple Runner Beans (turn green when cooked)
Black-eyed peas
Butter Beans
Holstein Beans (first time trying these--they're black & white like the cow)
Strawberries
Onions (red and Texas Sweet)
Cabbage
Broccoli
English Peas
Cucumbers
Squash
Corn
Watermelons
Cantaloupes (Tigger Melons)
If all goes as planned, I will be a canning fool by June :-) 


Monday, April 21, 2014

HAPPY EASTER!!

Country Bread Baking Day

I've started making my own bread every Friday.  I played around with several recipes until I found the right balance and it hasn't failed me yet.  Compared to "store bought" bread, homemade is the way to go!  The crust is nice and soft and the bread holds it's shape, making it perfect for sandwiches (use it for a grilled cheese; you won't be disappointed!). 


Ingredients
2 packages (1/4 ounce each) active dry yeast.  If you are using bulk yeast, 4 1/2 tsps.
2 cups warm water (110° to 115°)
1/2 cup sugar
2 teaspoons kosher salt
2 eggs, lightly beaten
1/4 canola oil (I also use vegetable oil)
6 1/2 to 7 cups unbleached all purpose flour

Directions
In a large bowl, dissolve yeast in warm water.  Allow the yeast to "work" for about 5 minutes. 
In a large bowl, or the bowl of a stand mixer (with dough hook attached) add sugar, salt, eggs, oil and 3 cups of flour.  Beat until smooth.  Continue adding flour to form a soft dough.

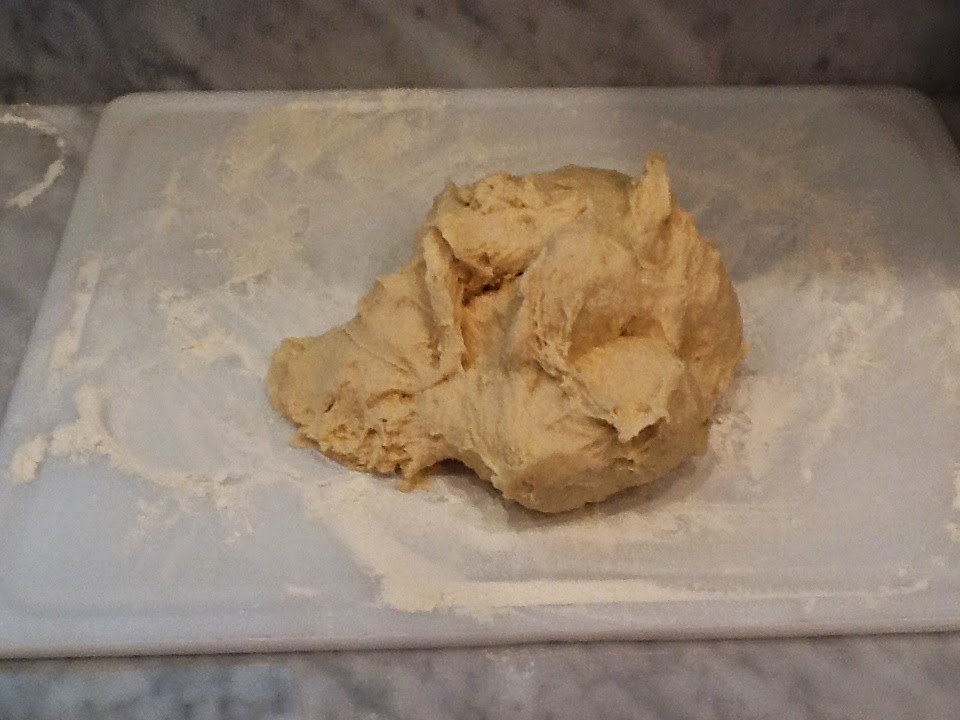
If using a standmixer with a hook attachment, mix on setting "2" for about 5 minutes, then turn onto a floured surface and knead until smooth and elastic.  If kneading by hand, knead approximately 6 to 8 minutes.  Place in a greased bowl, turning once to grease top.  Cover and let rise in a warm place until doubled, about 1 hour.

Punch dough down.  Divide in half and shape into loaves.  Place in two greased 9" x 5" loaf pans.  Cover and let rise again until doubled in size.

Bake at 375° for 25-30 minutes or until golden grown.  Yield 2 loaves


Monday, April 14, 2014

Busy Weekend!!

I finished my "scrap yard" green house and I must say I am very pleased with how it turned out.  I used several old windows and some scrap pallet wood I had saved for projects.  I did have to purchase the clear sheeting for the roof and some treated posts and 2x4s but all together it cost less than $200.  It's not that large, but perfect for what I need to use it for.  Already have trays full of seeds and I'm anxiously waiting to see how quickly they sprout.


The square foot garden project is well underway and I already have a nice stand of English Peas.  I have a panel ready to install for them to climb.  I used the "Mel's Mix" recommendation for the soil and it sure better make as that crap ain't cheap! 
I took a couple of hours to plant a bed around an oak tree that was only about 5 foot tall two years ago when I started building my house.  Still have to mulch the flowers but I was pleased with the way it turned out.  Still need to get the grass to grow and I may seed it one more time, but we have such sandy soil here it's difficult to get "good" grass to grow.

Road to Serenity


The road down to my farm house.  I love this view.  No matter how stressful the day has been, the moment I turn onto this road, the stress of the day melts away.  Sitting on the back porch with a big glass of sweet tea watching the deer sneaking through the woods.

Monday, April 7, 2014

Favorite Dill Pickle Recipe

This is one of my favorite pickle recipes.  As with any canning, please insure your jars and lids are well sanitized before you start.

Brine
1 quart white vinegar
3 quarts water
1 cup of pickling salt

Bring to boil and stir until all salt is dissolved

Place cucumbers in quart jars (I use wide mouth jars because they are easier to pack)

To each jar, add the following:
1/8 tsp alum
1/8 tsp crushed red pepper
1/8 tsp minced garlic
1 tsp dill seed
**I like my pickles spicier, so I double the amounts above**

Pour liquid in jars, leaving 1" head space, place lids on jars and water bath for 5 to 10 minutes.

Note:  I have found that soaking the cucumbers in ice water for at least two hours before pickling helps the pickles to be more crunchy and not mushy.

Thursday, April 3, 2014

Back to the Basics

At the age of 48 I became a widow.  After 30 years of marriage, I lost my best friend, my partner and the one person in the world that knew everything there was to know about me and loved me anyway.  Sometimes, finding yourself at a crossroad you thought was miles ahead has a way of knocking you to your knees, no matter how strong you may be.
This is my journey of my simpler life—I like the sound of that.